
How to Import Excel Data into a Local SQL Server Database
Instructions reviewed 19 October 2026. This worked example imports a CSV file, not a native Excel workbook. If your data starts in Excel, export the required worksheet as CSV or use the XLSX route below.
The video and remaining screenshots show the original SQL Server 2019/SSMS 18 setup. They are historical illustrations; current screens and connection options can differ. Follow the revised written steps and Microsoft’s linked guidance.
Step 1: Install a supported SQL Server edition
Choose an edition from Microsoft’s SQL Server downloads suited to your environment. Developer editions are for development and testing, not production; Express is free with capacity and feature limits. Check current licence terms and system requirements. Installation and troubleshooting time varies.
Note the Database Engine instance name and authentication configured during installation. Use authorised sample data and a separate learning database.
Step 2: Install SQL Server Management Studio
Follow Microsoft’s current SSMS installation instructions. SQL Server and SSMS are separate components. Open SSMS and connect to the Database Engine instance you configured.
CSV and XLSX use different import routes
CSV: save the intended worksheet as CSV and inspect the exported file. It does not preserve workbook sheets, formatting or formula definitions. Check dates, decimals, delimiters and leading zeros. The Import Flat File Wizard reads text files such as CSV, not XLSX directly.
XLSX: use a supported method from Microsoft’s Excel-to-SQL guidance, such as the SQL Server Import and Export Wizard with an Excel source. Check required Excel connectivity components and their architecture against the wizard you run. If direct import is unavailable, export the selected worksheet as CSV and follow this example.
Step 3: Create a local learning database
Connect to your installed Database Engine instance in SSMS. In Object Explorer, right-click Databases, choose New Database and give it a name such as AirBnB_Example. Confirm settings appropriate to your environment; you need permission to create a database.
If the connection fails, check the instance name, running service and authentication method. Use approved certificate and connection settings rather than bypass an unexplained security error.
Step 4: Import the sample CSV file
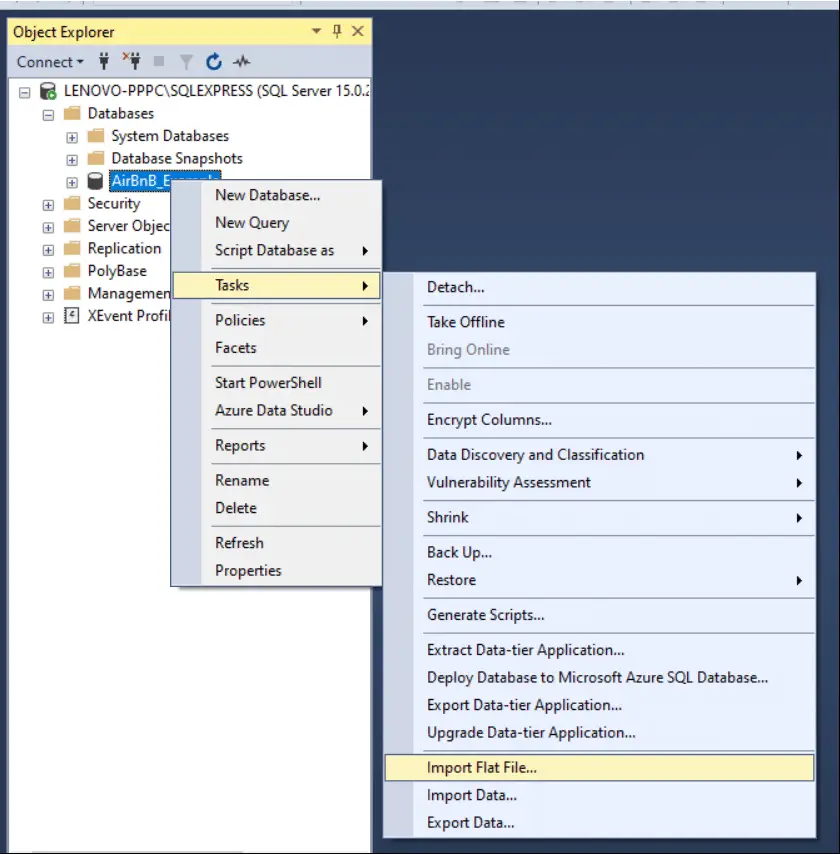
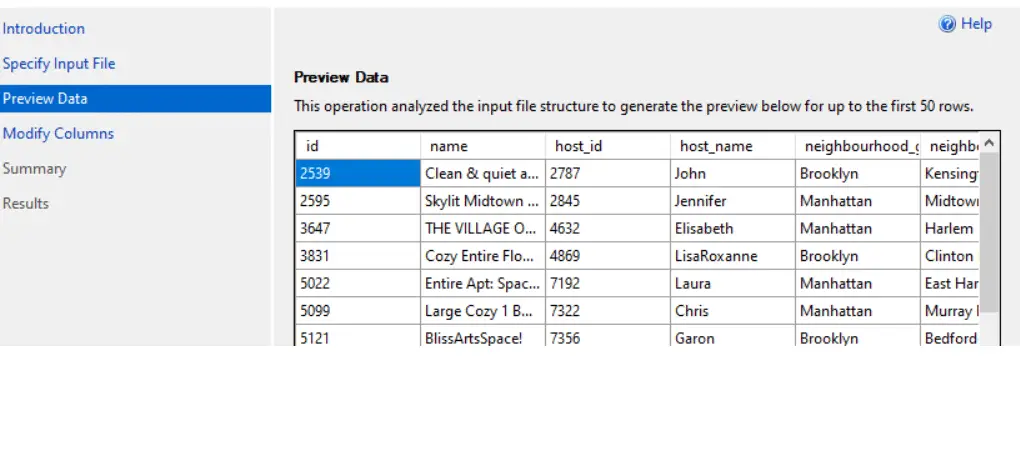
The example uses AB_NYC_2019.csv, a historical New York City Airbnb dataset. Right-click your learning database, choose Tasks, then Import Flat File. Select the CSV, choose a new table name and check inferred data types, lengths and null handling. Historical screenshots below illustrate the sequence.
After importing, compare the row count with the source and inspect representative prices, dates, missing values and text containing commas. A success message confirms completion, not that each field was interpreted correctly.
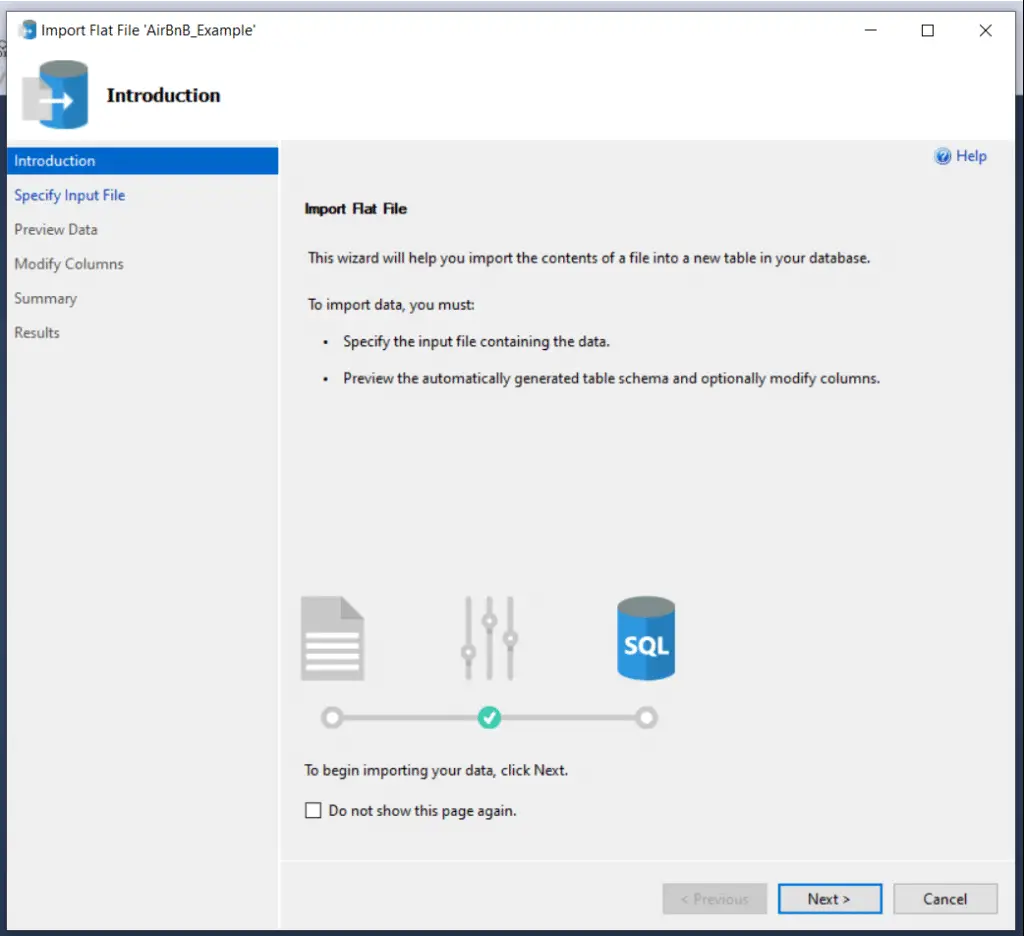
In a new window, you will see:
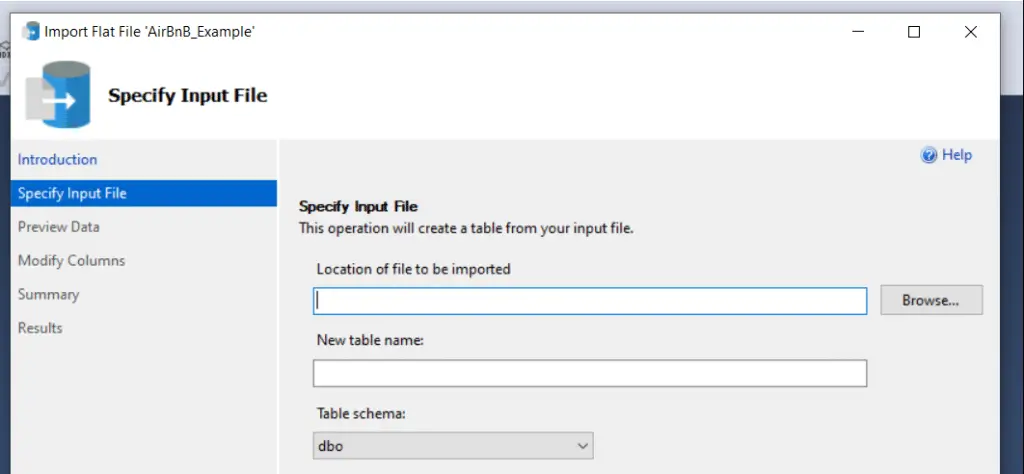
After pressing next, the installation wizard will ask you to select the file you want to import. Plus, you will be able to create a name for your table. I keep the name AB_NYC_2019 as a file name.
Next window will give you a preview of your data, which look a lot like in excel file.
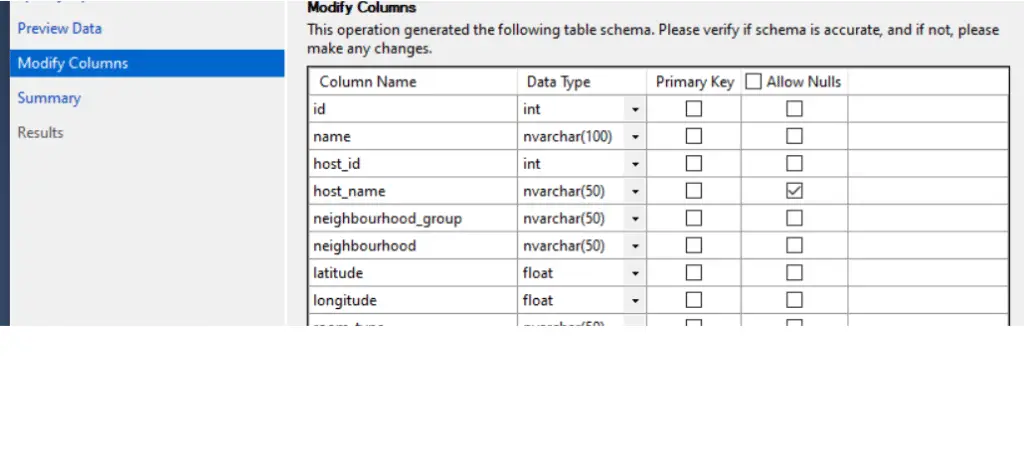
After a preview, you will be asked to specify Data Types, Primary Keys and if you allow Null values in your data. The system made some suggestions for us. Yet, I will make some changes, for instance, I know some of my data has more characters. Thus, I will increase the number of characters allowed in those fields.
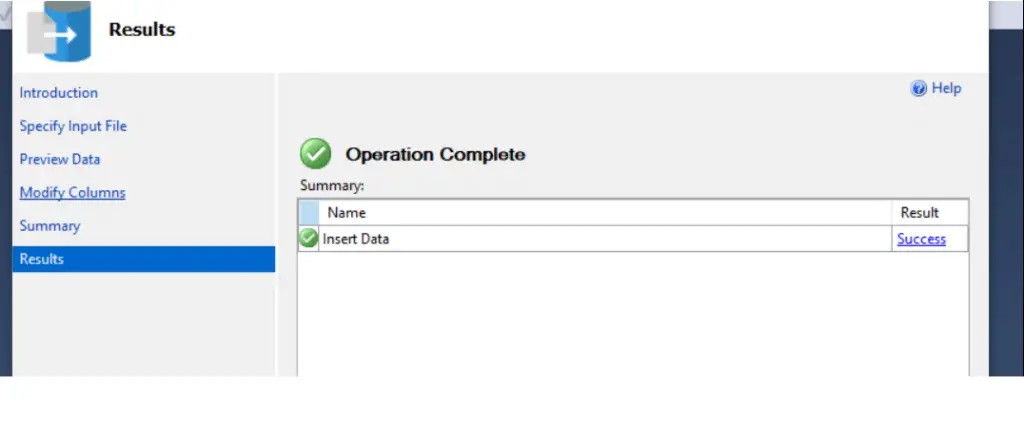
Finally, you get to the Results window. If you get an error message, then click on it and have a look. You will probably need to change some columns to accept Nulls or change Data Types to allow more characters. If it says Success you are done!
Step 5: SQL Sample Code
Let’s run the SQL code to test our brand new table. In the code, I am creating a group out of neighbourhood_group and room_type and look into the average price.
SELECT
	neighbourhood_group
	,room_type
	,AVG(price) AS "Avg Price"
FROM AB_NYC_2019
GROUP BY
	neighbourhood_group
	,room_type
ORDER BY neighbourhood_group, room_type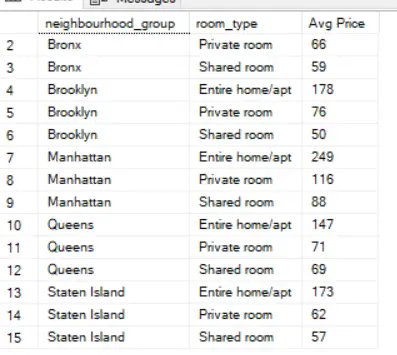
Well done!
Now, you can experiment with your files using SQL, Excel. There are a lot of resources and sample files in https://www.kaggle.com/. I got my example there as well.
Let me know where you are going to use this new trick. What sort of fresh insights have you gained? Do you have some cool tips for us as well? Leave in the comments below.
Put It Into Practice
Pick one thing from this article to try on your next project. If you need a starting point, Resources has free status report, action log and decision log templates. For a difficult conversation, try the People Field Guide.
Get new practical guides by email →
About Paulius
I’m Paulius Petravicius, a project manager with a background in business and data analysis. I share practical ways to make everyday project work a little easier. Read my story →